Metal roofing has become an increasingly popular choice for homeowners looking for durability, energy efficiency, and an attractive appearance. Whether you’re replacing an old roof or constructing a new home, installing a metal roof can provide long-lasting protection against the elements. In this guide, we will walk you through the essential steps to install metal roofing, ensuring that the process is both safe and efficient.
Why Choose Metal Roofing?
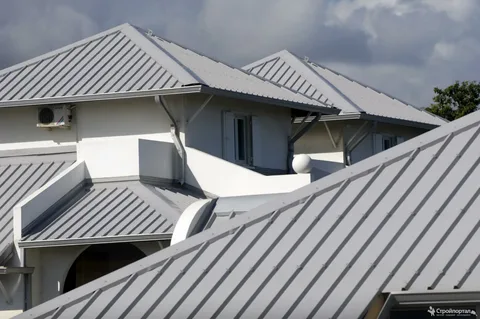
Before diving into the installation process, it’s important to understand why metal roofing is a great choice. Metal roofs are known for their longevity, with many lasting up to 50 years or more. They are also fire-resistant, lightweight, and energy-efficient, helping to keep your home cool in the summer and warm in the winter. Additionally, metal roofing is available in a variety of colors and styles, allowing you to customize the look of your home.
Preparing for Installation
1. Gather Your Materials
Before you begin, ensure that you have all the necessary materials and tools. The basic materials include:
- Metal roofing panels
- Roofing underlayment (such as synthetic or felt)
- Flashing for chimneys, vents, and roof edges
- Screws specifically designed for metal roofing
- Ridge caps
- Roof battens (optional, depending on the roof type)
You’ll also need the proper tools for the job:
- Safety gear (gloves, goggles, and fall protection equipment)
- Ladder
- Tape measure
- Chalk line
- Drill with screwdriver bits
- Tin snips (for cutting metal)
- Hammer
2. Prepare the Roof Surface
Before laying down any metal panels, the roof deck must be properly prepared. Ensure that the decking is stable, dry, and free from debris. If you’re installing the metal roofing on an existing roof, inspect the shingles or underlayment. It’s usually recommended to remove old roofing materials to prevent moisture buildup and ensure a secure installation.
3. Install Roofing Underlayment
The underlayment provides an additional layer of protection against moisture and helps the metal roof adhere more securely. Lay the underlayment from the bottom of the roof upwards, overlapping each row to create a waterproof barrier. Secure it in place with staples or nails. Make sure the underlayment is taut and free from wrinkles.
Installing the Metal Roof Panels
4. Position the First Panel
Start at the edge of the roof and position the first metal roofing panel. Make sure it’s aligned properly along the edge and that it overhangs slightly to allow for proper water runoff. This panel should be placed flush with the roof’s edge.
5. Fasten the Panel to the Roof
Using screws, secure the metal panel to the roof deck. The screws should go through the raised ribs of the metal panels, not through the flat surfaces. This helps maintain the integrity of the panels and prevents leaks. Be sure to space the screws approximately 12 inches apart along the panel’s edge and throughout the length of the panel. Follow the manufacturer’s guidelines for screw placement to avoid damaging the panels.
6. Install Additional Panels
Continue to install the next panels, making sure each panel overlaps the previous one by about 1 to 2 inches. This overlap is crucial for preventing leaks and ensuring water runs off the roof properly. As you move along the roof, secure each panel in place with screws, following the same pattern.
7. Cut Panels as Necessary
In some cases, you’ll need to cut the metal panels to fit around obstacles like chimneys, vents, or skylights. Use tin snips to carefully cut the panels to the desired length. Always measure twice before cutting to ensure accuracy.
Installing Flashing and Ridge Caps
8. Install Flashing
Flashing is used around roof penetrations, such as chimneys, vents, and skylights, to prevent water from seeping under the roof panels. Flashing comes in various forms, including step flashing, counter flashing, and apron flashing. Install the flashing around these areas, ensuring a secure seal between the metal panels and the flashing.
For chimneys or vents, apply the flashing in layers, ensuring that each layer overlaps the next to create a watertight barrier. Fasten the flashing to the roof using screws or nails.
9. Add Ridge Caps
Ridge caps are installed at the top of the roof, where two roof slopes meet. These caps cover the gap and prevent water from entering. Position the ridge caps over the top of the roof and secure them with screws along the edges. Make sure the ridge caps overlap each other by a few inches to prevent any gaps.
Finishing Touches
10. Inspect the Roof
After the metal roofing panels are installed, do a thorough inspection of the entire roof. Check for any loose screws, gaps, or areas where water might leak through. Make sure all seams are securely fastened, and ensure that the flashing is properly sealed around roof penetrations.
11. Clean Up the Area
Once the installation is complete, clean up any debris or leftover materials. Dispose of any metal scraps, nails, or old roofing materials properly. Ensure the roof is free from any sharp edges or protruding nails that could pose a safety risk.
Conclusion
Installing metal roofing may seem like a complex task, but with the right preparation and attention to detail, it can be a rewarding project. By following these steps and ensuring that the roof is properly installed, you’ll be able to enjoy the benefits of a durable, weather-resistant, and energy-efficient roof for years to come. Always take safety precautions and consider hiring a professional if you’re unsure about any part of the installation process.
FAQs
What type of metal roofing is best?
The best type of metal roofing depends on your specific needs and preferences. Steel and aluminum are the most common materials. Steel is more durable and cost-effective, while aluminum is lighter and resistant to corrosion. Copper and zinc are also options, though they are more expensive.
Can I install metal roofing over shingles?
Yes, you can install metal roofing over existing shingles, but it’s not always recommended. While it can save time and money, it’s best to remove old shingles to ensure a more secure installation and prevent moisture buildup between the layers.
How long does a metal roof last?
Metal roofs are incredibly durable and can last 40 to 70 years, depending on the material. Steel roofs can last 40-50 years, while aluminum and copper roofs may last even longer. Proper maintenance can help extend the life of your roof.
Is it necessary to hire a professional for metal roofing installation?
While it’s possible to install metal roofing yourself if you have the proper tools and experience, hiring a professional roofing contractor is often the best choice. A professional will ensure that the roof is installed correctly and can help with complex roof designs.